The features of Group Policy Management were installed during the DC Role Installation. Many of the management features haven’t changed as compared to the previous versions of Windows Server. To create a GPO (Group Policy Overview), we need to follow the steps given below.
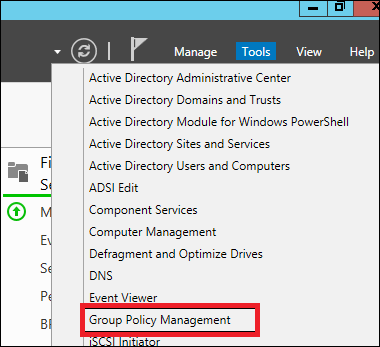
Step 1 − To create a GPO open the Group Policy Management Console (GPMC), go to Server Manager → Tools → Group Policy Management as shown in the screenshot below.
GPM
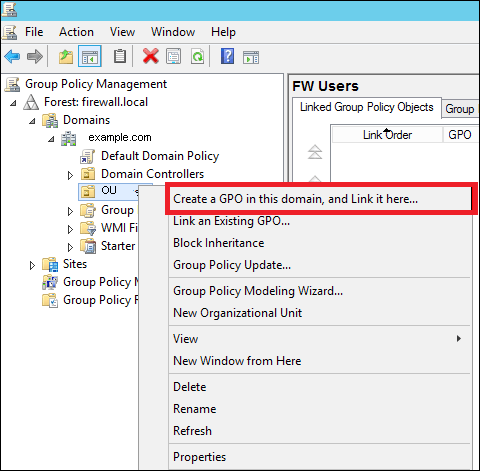
Step 2 − Right-click on an OU → select the first option Create a GPO in this domain and Link it here.
OU
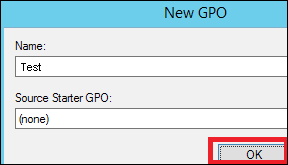
Step 3 − Type the Name for this GPO object → click OK button. We have selected the name as Test GPO.
Test GPO
Step 4 − Right-click the GPO object and click Edit.

Comments

Popular posts from this blog

The Windows Firewall with Advanced Security is a firewall that runs on the Windows Server 2012 and is turned on by default. The Firewall settings within Windows Server 2012 are managed from within the  Windows Firewall Microsoft Management Console . To set Firewall settings perform the following steps − Step 1  − Click on the Server Manager from the task bar → Click the Tools menu and select Windows Firewall with Advanced Security. Step 2  − To see the current configuration settings by selecting  Windows Firewall Properties  from the MMC. This  allows access to modify the settings  for each of the three firewall profiles, which are –  Domain, Private and Public  and IPsec settings. Step 3  − Applying custom rules, which will include the following two steps − Select either  Inbound Rules  or  Outbound Rules  under  Windows Firewall with Advanced Security  on the left side of the management console...
In this chapter, we will see how to enable remote desktop application. It is important because this enables us to work remotely on the server. To do this, we have the following two options. For the first option, we have to follow the steps given below. Step 1  − Go to Start → right click “This PC” → Properties. Step 2  − On Left side click “Remote Setting”. Step 3  − Check radio button “Allow Remote connection to this computer” and Check box “Allow connection only from computers running Remote Desktop with Network Level Authentication (recommended)” → click “Select Users”. Step 4  − Click Add. Step 5  − Type user that you want to allow access. In my case, it is administrator → click OK. For the  second option , we need to follow the steps given below. Step 1  − Click on “Server Manage” → Local Server → click on “Enable” or Disable, if it is Disabled.
The table creation command requires: Name of the table Names of fields Definitions for each field Syntax: Here is generic SQL syntax to create a MySQL table: CREATE TABLE table_name ( column_name column_type ); Now, we will create following table in  TUTORIALS  database. tutorials_tbl ( tutorial_id INT NOT NULL AUTO_INCREMENT , tutorial_title VARCHAR ( 100 ) NOT NULL , tutorial_author VARCHAR ( 40 ) NOT NULL , submission_date DATE , PRIMARY KEY ( tutorial_id ) ); Here few items need explanation: Field Attribute  NOT NULL  is being used because we do not want this field to be NULL. So if user will try to create a record with NULL value, then MySQL will raise an error. Field Attribute  AUTO_INCREMENT  tells MySQL to go ahead and add the next available number to the id field. Keyword  PRIMARY KEY  is used to define a column as primary key. You can use multiple columns separated by comma to define...