Easy Printing is a feature which allows the client that connects via RDS to print over the network. It is installed in Windows server 2012 by default. Easy Printing is basically where the printer device is defined on the client system and a printer is connected directly via the network. All configuration is done via Group Policy Objects.
The configuration settings can be found at Computer Configuration – Administrative Templates – Remote Desktop Services – Printer Redirection.
For User Configuration, it will be have the same path – Administrative Templates – Remote Desktop Services – Printer Redirection.
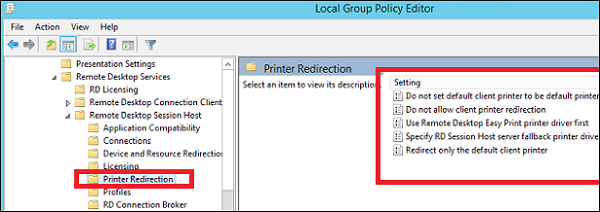
Printer Redirection
In administration, another important aspect is to set the priority for the printer, so the users have the same printer installer and can print as per their priorities. In this, the users printing with higher priorities overpass the printing will lower priorities.
To do so, you need to add different logical printers and then add then as per the users or departments that have different priorities.
To do this, firstly let us add a printer to the print server by following the steps given below.
Step 1 − Click on Server Manager → Tools → Print Management → then on the left panel click Print Servers → then right click on Printers and → Add Printer.
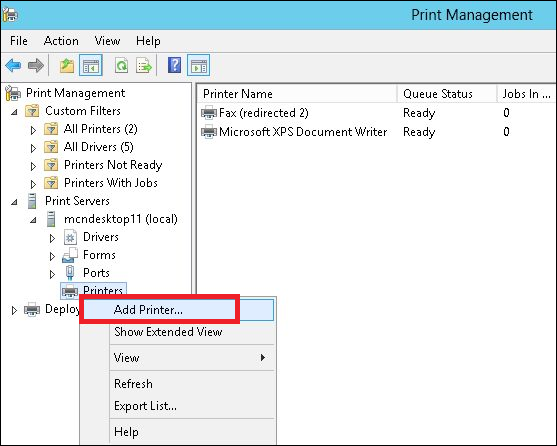
Add Printer
Step 2 − Next, follow the wizard to add the network printer like you do for a normal workstation and at the end this printer will be shown in the Printer Management.
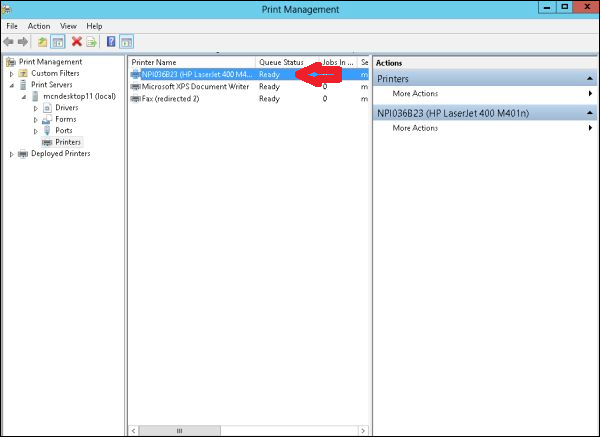
Print Management
Step 3 − Now that we have installed the printer, we can set the priority on this printer – Right click on the printer → Advanced → put a number at Priority from 1-99 → OK.

Comments

Popular posts from this blog

Virtualization is one of the most important technology feature and Microsoft has invested on this and the responsible role is called as Hyper-V. Let us now see how to install the Hyper-V Role, for doing this we should follow the steps given below. Step 1  − To Install DNS role go to “Server Manager” → Manage → Add Roles and Features. Step 2  − Click Next. Step 3  − Select the  Role-based  or  feature-based installation  option → click Next. Step 4  − I will install a Local Hyper-V role as it will Select a server from the server pool → Next. Step 5  − From the Roles lists, check the Hyper-V Server role → click Add Features on the popup windows which show up and then → Next. Step 6  − Click Next. Step 7  − Choose your server’s physical network adapters that will take part in the virtualization → Next. Step 8  − Under  Migration , leave the default settings →  Next . Step 9  − Choose the...
The Windows Firewall with Advanced Security is a firewall that runs on the Windows Server 2012 and is turned on by default. The Firewall settings within Windows Server 2012 are managed from within the  Windows Firewall Microsoft Management Console . To set Firewall settings perform the following steps − Step 1  − Click on the Server Manager from the task bar → Click the Tools menu and select Windows Firewall with Advanced Security. Step 2  − To see the current configuration settings by selecting  Windows Firewall Properties  from the MMC. This  allows access to modify the settings  for each of the three firewall profiles, which are –  Domain, Private and Public  and IPsec settings. Step 3  − Applying custom rules, which will include the following two steps − Select either  Inbound Rules  or  Outbound Rules  under  Windows Firewall with Advanced Security  on the left side of the management console...

HaydarOrac