In this chapter, we will see how to configure WSUS and tune it. The following steps should be followed for configuring it.
Step 1 − When you open it for the first time, you should do it by going to “Server Manager” → Tools → Windows Server Update Services, then a Configuration wizard will be opened and then click → Next.
Server Manager Tools
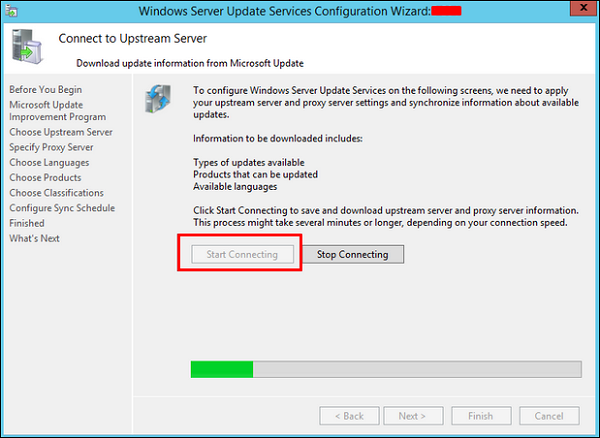
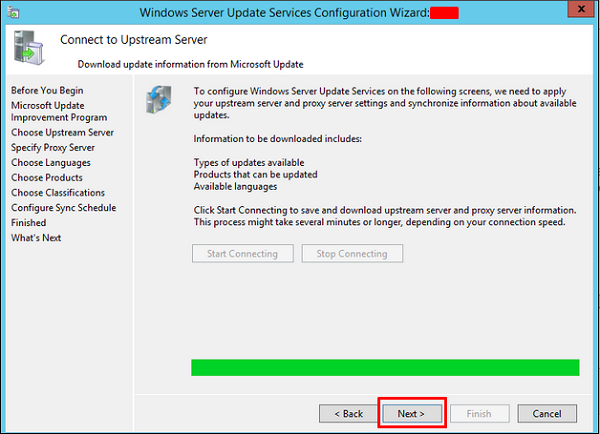
Step 2 − Click “Start Connecting” → Wait until the green bar is full and then → Next.
Start Connecting
Green Bar Full
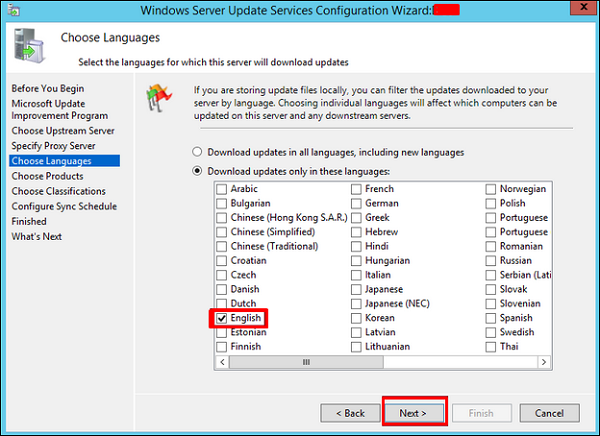
Step 3 − Check the box for which the updates want to be taken, I did for English and then → Next.
Choose Languages
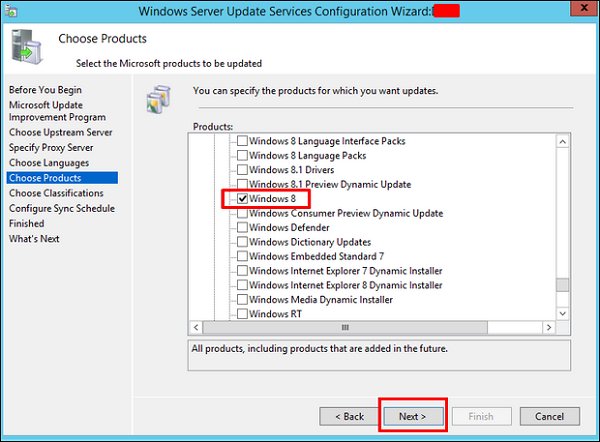
Step 4 − Check the box for all the products which you want to update. It is just for Microsoft products and it is recommended to include all the products related to Microsoft and then → Next.
Choose Products
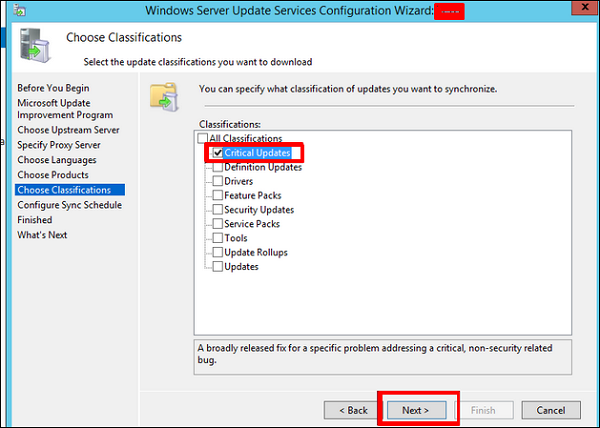
Step 5 − Choose the classification updated to be downloaded, if you have a very good internet speed, then check all the boxes, otherwise just check “Critical Updates”.
Choose Classifications
Step 6 − Now we should schedule the updates which I will recommend to do it automatically during night time → Next.
Configure Sync Schedule
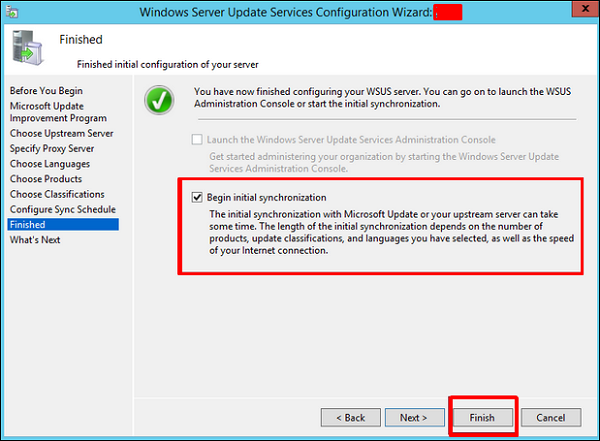
Step 7 − Check Box “Begin initial synchronization” → Finish.
Begin Initial Synchronization
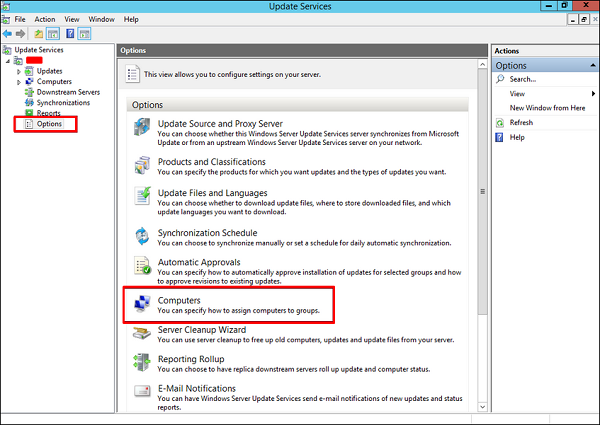
Step 8 − Now the WSUS console will be open and we must add the computer to WSUS. To do this, go to Options → Computers.
Computers
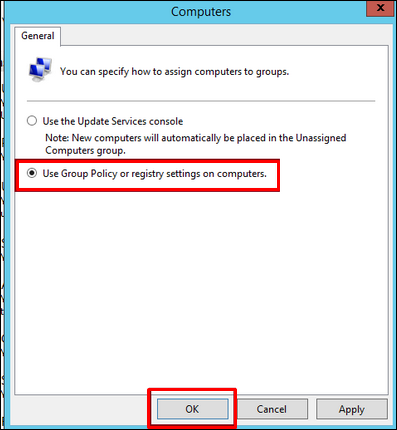
Step 9 − If you have a Domain Controler environment, choose the second option like in my case, otherwise choose the first option and then → OK.
domain Control
Step 10 − After you have done all this, you should approve updates, which is similar like how it is done in the previous version. To do this – Right click on the updates → Approve as shown in the screenshot given below.
Approve
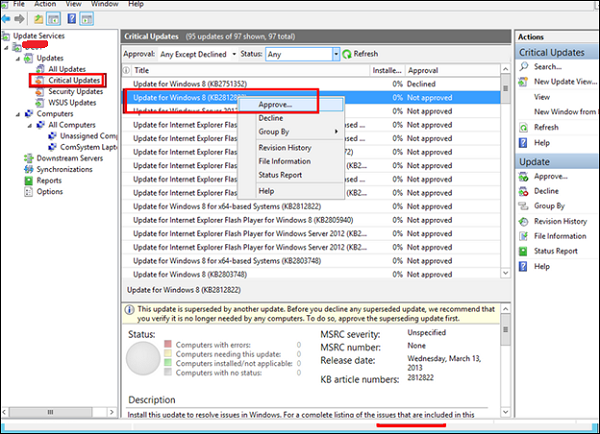
Step 11 − Then you should click Approve for install as shown in the screenshot given below.

Comments

Popular posts from this blog

The Windows Firewall with Advanced Security is a firewall that runs on the Windows Server 2012 and is turned on by default. The Firewall settings within Windows Server 2012 are managed from within the  Windows Firewall Microsoft Management Console . To set Firewall settings perform the following steps − Step 1  − Click on the Server Manager from the task bar → Click the Tools menu and select Windows Firewall with Advanced Security. Step 2  − To see the current configuration settings by selecting  Windows Firewall Properties  from the MMC. This  allows access to modify the settings  for each of the three firewall profiles, which are –  Domain, Private and Public  and IPsec settings. Step 3  − Applying custom rules, which will include the following two steps − Select either  Inbound Rules  or  Outbound Rules  under  Windows Firewall with Advanced Security  on the left side of the management console...
The table creation command requires: Name of the table Names of fields Definitions for each field Syntax: Here is generic SQL syntax to create a MySQL table: CREATE TABLE table_name ( column_name column_type ); Now, we will create following table in  TUTORIALS  database. tutorials_tbl ( tutorial_id INT NOT NULL AUTO_INCREMENT , tutorial_title VARCHAR ( 100 ) NOT NULL , tutorial_author VARCHAR ( 40 ) NOT NULL , submission_date DATE , PRIMARY KEY ( tutorial_id ) ); Here few items need explanation: Field Attribute  NOT NULL  is being used because we do not want this field to be NULL. So if user will try to create a record with NULL value, then MySQL will raise an error. Field Attribute  AUTO_INCREMENT  tells MySQL to go ahead and add the next available number to the id field. Keyword  PRIMARY KEY  is used to define a column as primary key. You can use multiple columns separated by comma to define...
In this chapter, we will see how to Install Active Directory in Windows Server 2012 R2. Many of us who have worked with the previous version run  DCPROMO.EXE  to install it, but in the 2012 version, it is recommended by Microsoft not to use it anymore. To continue with Installation follow the steps given below. Step 1  − Go to “Server Manager” → Manage → Add Roles and Feature. Step 2  − Click the Next button. Step 3  − As we are installing AAD on this machine, we will select “Role-based or featurebased Installation” → Next. Step 4  − Click on “Select a server from the server pool”, this is the case when it will be installed locally. Step 5  − Check mark in the box next to  Active Directory Domain Services . A box will be explaining additional roles services or features which are also required to install domain services. Step 6  − Click Add Features. Step 7  − Check “Group Policy Management” → Next. Step 8  ...