The IIS (Internet Information Services) is facing internet all the time. So, it is important to follow some rules in order to minimize the risk of being hacked or having any other security issues. The first rule is to take all the updates of the system regularly. The second one is to create different application polls to this, which can be done by following the steps shown below.
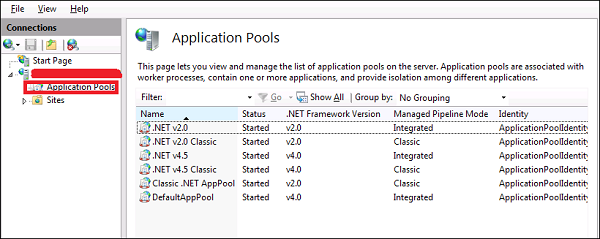
Step 1 − You have to go to: Server Manager → Internet Information Services(IIS) Manager → Application Pulls.
Application Pools
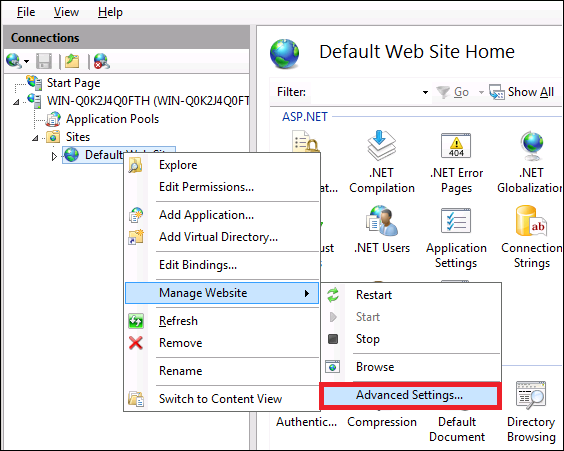
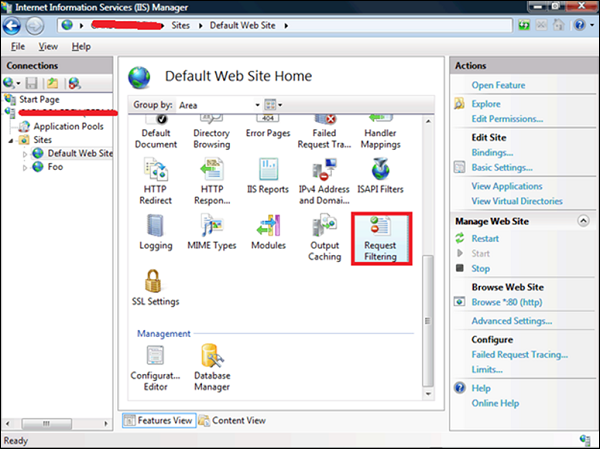
Step 2 − Click “Sites” → Right Click “Default Website” → Manage Website → Advance Settings.
Sites
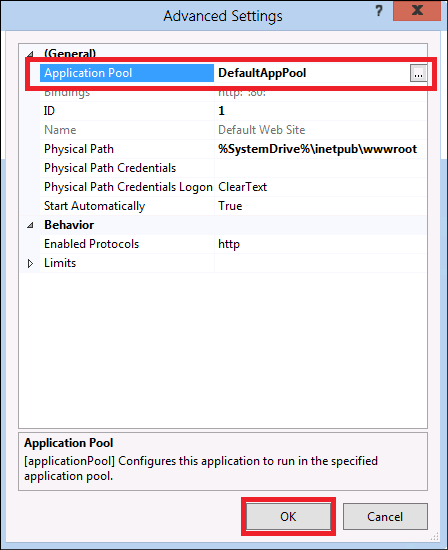
Step 3 − Select the Default Pools.
Default Pools
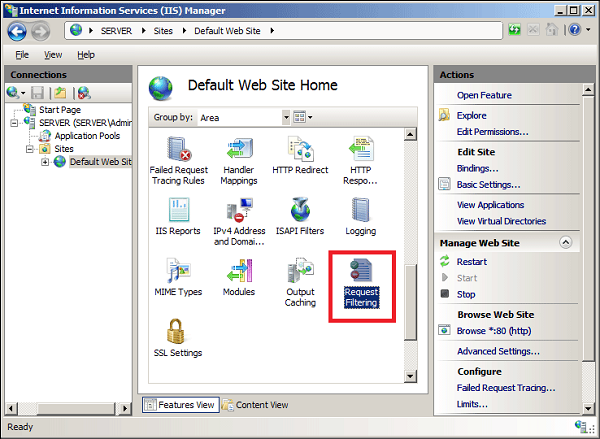
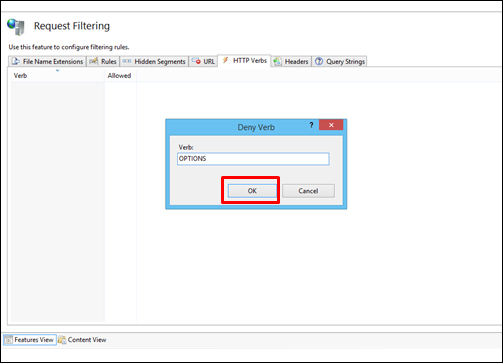
Step 4 − Disable the OPTIONS method, this can be done by following the path – Server Manager → Internet Information Services (IIS) Manager → Request Filtering.
Request Filtering
Step 5 − In the action pane, select "Deny Verb" → Insert ‘OPTIONS’ in the Verb → OK.
Deny Verb
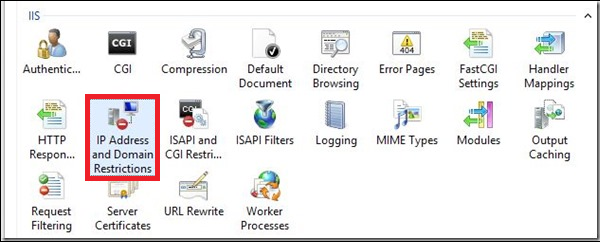
Step 6 − Enable Dynamic IP Restrictions blocks by going to – IIS Manager → Double click on "IP Address and Domain Restrictions" → Actions pane.
Actions Pane
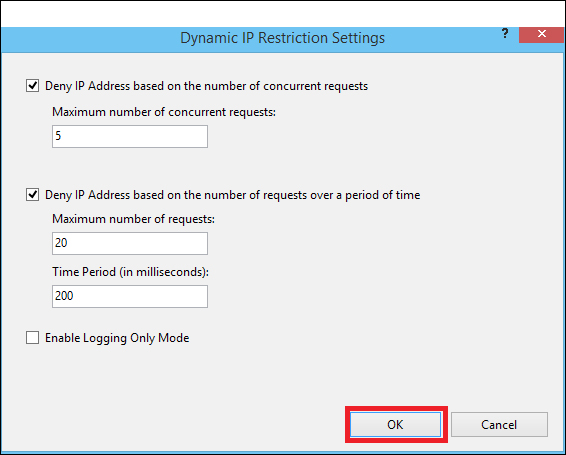
Step 7 − Then select "Edit Dynamic Restriction Settings" → Modify and set the dynamic IP restriction settings according to your needs → press OK.
Edit
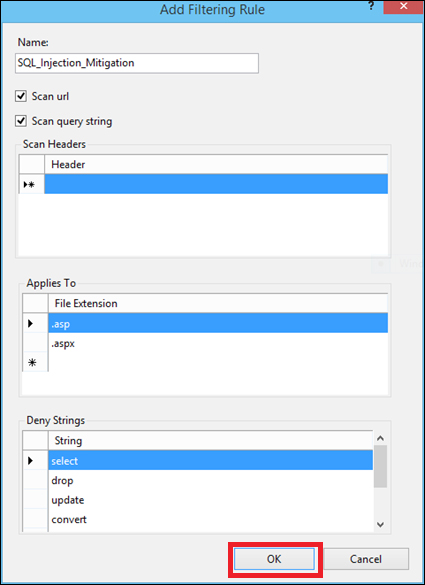
Step 8 − Enable and Configure Request Filtering Rules, to do this – IIS Manager → Double click on "Request Filtering" → Change to the Rules tab → Actions Pane.
Rules Tab
Step 9 − Then select "Add Filtering Rule" → Set the required rules → Click OK.
Add Filtering Rule
Step 10 − Enable logging, to do this we need to follow this path – IIS Manager → select the specific site you want to configure → Logging.

Comments

Popular posts from this blog

The Windows Firewall with Advanced Security is a firewall that runs on the Windows Server 2012 and is turned on by default. The Firewall settings within Windows Server 2012 are managed from within the  Windows Firewall Microsoft Management Console . To set Firewall settings perform the following steps − Step 1  − Click on the Server Manager from the task bar → Click the Tools menu and select Windows Firewall with Advanced Security. Step 2  − To see the current configuration settings by selecting  Windows Firewall Properties  from the MMC. This  allows access to modify the settings  for each of the three firewall profiles, which are –  Domain, Private and Public  and IPsec settings. Step 3  − Applying custom rules, which will include the following two steps − Select either  Inbound Rules  or  Outbound Rules  under  Windows Firewall with Advanced Security  on the left side of the management console...
In this chapter, we will see how to enable remote desktop application. It is important because this enables us to work remotely on the server. To do this, we have the following two options. For the first option, we have to follow the steps given below. Step 1  − Go to Start → right click “This PC” → Properties. Step 2  − On Left side click “Remote Setting”. Step 3  − Check radio button “Allow Remote connection to this computer” and Check box “Allow connection only from computers running Remote Desktop with Network Level Authentication (recommended)” → click “Select Users”. Step 4  − Click Add. Step 5  − Type user that you want to allow access. In my case, it is administrator → click OK. For the  second option , we need to follow the steps given below. Step 1  − Click on “Server Manage” → Local Server → click on “Enable” or Disable, if it is Disabled.