Remote Management Service is one of the most important part pertaining to administration of Windows Server 2012. Administration of servers is performed through Windows Management Instrumentation. WMI instructions can be sent over network WinRM “Remote Management”.
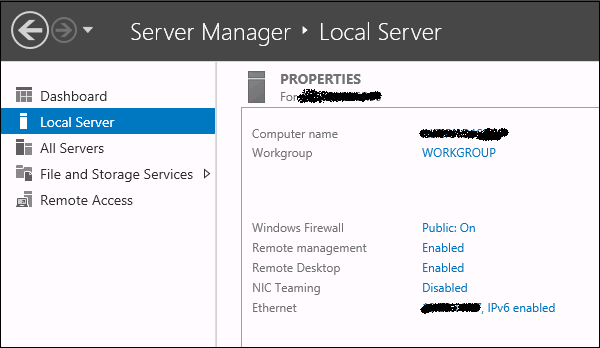
By default this utility is enabled, you can check it by going to Server Manager → then click on Local Server as shown in the following screenshot.
Local Server
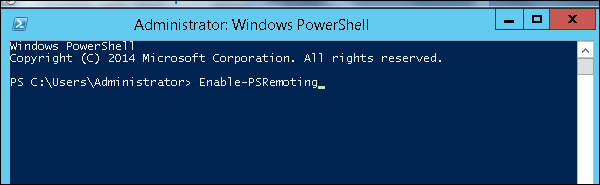
If in case it is disabled, you can enable it by Opening PowerShell and then typing EnablePSRemoting as shown in the screenshot given below.
Enable PSRemoting
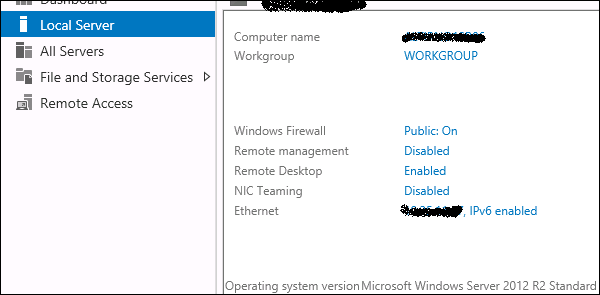
There is another way to enable it – Click on “Server Manager” → Local Server, then ENABLE Remote management.
Enable Remote Management

Adding a Server for Remote Management

To add other servers for remote management, follow the steps given below −
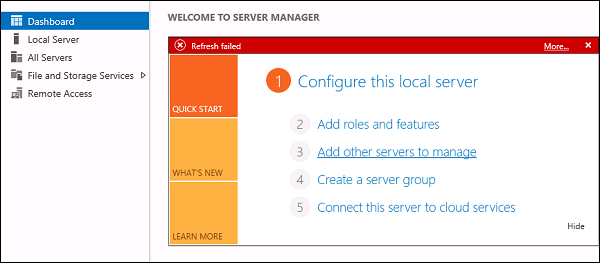
Step 1 − Server Manager → Dashboard → Add other servers to manage.
Dashboard
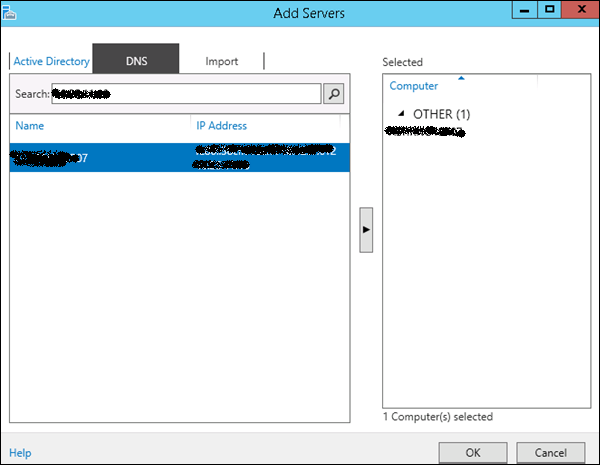
Step 2 − If the servers are joined to the domain, you add the select option “Active Directory“, in my case they are not joined, so I selected the second option “DNS” → In the search Box, I added the IP of the server that has to be managed → click on a small arrow → OK.
DNS
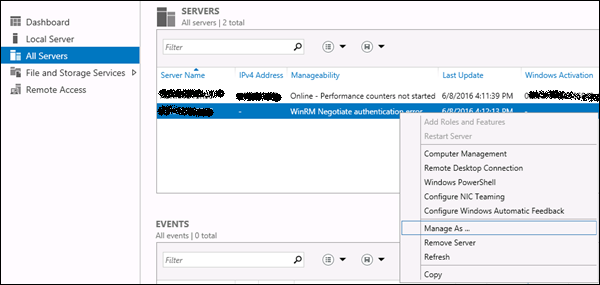
Step 3 − Go to Server Manager → All Servers, you will see the server that you have added. As my server is in the Work Group, I have to right click and click on – “Manage As” as shown in the following screenshot.
Manage As
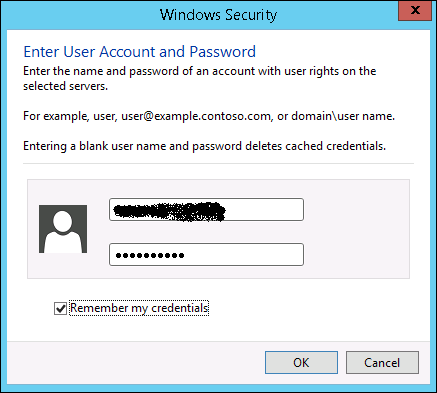
Step 4 − Enter the credentials of the remote server as follows and then → OK.
Windows Security
To remove a managed server, Right Click on server → Remove Server.

Comments

Popular posts from this blog

The Windows Firewall with Advanced Security is a firewall that runs on the Windows Server 2012 and is turned on by default. The Firewall settings within Windows Server 2012 are managed from within the  Windows Firewall Microsoft Management Console . To set Firewall settings perform the following steps − Step 1  − Click on the Server Manager from the task bar → Click the Tools menu and select Windows Firewall with Advanced Security. Step 2  − To see the current configuration settings by selecting  Windows Firewall Properties  from the MMC. This  allows access to modify the settings  for each of the three firewall profiles, which are –  Domain, Private and Public  and IPsec settings. Step 3  − Applying custom rules, which will include the following two steps − Select either  Inbound Rules  or  Outbound Rules  under  Windows Firewall with Advanced Security  on the left side of the management console...
The IIS ( Internet Information Services ) is facing internet all the time. So, it is important to follow some rules in order to minimize the risk of being hacked or having any other security issues. The first rule is to take all the updates of the system regularly. The second one is to create different application polls to this, which can be done by following the steps shown below. Step 1  − You have to go to: Server Manager → Internet Information Services(IIS) Manager → Application Pulls. Step 2  − Click “Sites” → Right Click “Default Website” → Manage Website → Advance Settings. Step 3  − Select the Default Pools. Step 4  − Disable the OPTIONS method, this can be done by following the path – Server Manager → Internet Information Services (IIS) Manager → Request Filtering. Step 5  − In the action pane, select "Deny Verb" → Insert ‘OPTIONS’ in the Verb → OK. Step 6  − Enable Dynamic IP Restrictions blocks by going to – IIS Manager → Double...
In this chapter, we will see how to enable remote desktop application. It is important because this enables us to work remotely on the server. To do this, we have the following two options. For the first option, we have to follow the steps given below. Step 1  − Go to Start → right click “This PC” → Properties. Step 2  − On Left side click “Remote Setting”. Step 3  − Check radio button “Allow Remote connection to this computer” and Check box “Allow connection only from computers running Remote Desktop with Network Level Authentication (recommended)” → click “Select Users”. Step 4  − Click Add. Step 5  − Type user that you want to allow access. In my case, it is administrator → click OK. For the  second option , we need to follow the steps given below. Step 1  − Click on “Server Manage” → Local Server → click on “Enable” or Disable, if it is Disabled.