Routing maps your URL to specific controller’s action. In this section, we will see how you can implement routes, how you can pass arguments from URL to controller’s action, how you can generate URLs, and how you can redirect to a specific URL. Normally, routes are implemented in file config/routes.php. Routing can be implemented in two ways −
- static method
- scoped route builder
Here is an example presenting both the types.
// Using the scoped route builder.
Router::scope('/', function ($routes) {
   $routes->connect('/', ['controller' => 'Articles', 'action' => 'index']);
});

// Using the static method.
Router::connect('/', ['controller' => 'Articles', 'action' => 'index']);
Both the methods will execute the index method of ArticlesController. Out of the two methods scoped route builder gives better performance.
Connecting Routes
Router::connect() method is used to connect routes. The following is the syntax of the method −
static Cake\Routing\Router::connect($route, $defaults =[], $options =[])
There are three arguments to the Router::connect() method −
- The first argument is for the URL template you wish to match.
- The second argument contains default values for your route elements.
- The third argument contains options for the route which generally contains regular expression rules.
Here is the basic format of a route −
$routes->connect(
   'URL template',
   ['default' => 'defaultValue'],
   ['option' => 'matchingRegex']
);
Example
Make changes in the config/routes.php file as shown below.
config/routes.php
<?php
   use Cake\Core\Plugin;
   use Cake\Routing\RouteBuilder;
   use Cake\Routing\Router;

   Router::defaultRouteClass('DashedRoute');
   Router::scope('/', function (RouteBuilder $routes) {
      $routes->connect('/', ['controller' => 'Tests', 'action' => 'index']);
      $routes->connect('/pages/*', ['controller' => 'Pages', 'action' => 'display']);
      $routes->fallbacks('DashedRoute');
   });
   Plugin::routes();
Create a TestsController.php file at src/Controller/TestsController.php. Copy the following code in the controller file.
src/Controller/TestsController.php
<?php
   namespace App\Controller;
   use App\Controller\AppController;

   class TestsController extends AppController{
      public function index(){
      }
   }
?>
Create a folder Tests under src/Template and under that folder create a View file called index.ctp. Copy the following code in that file.
src/Template/Tests/index.ctp
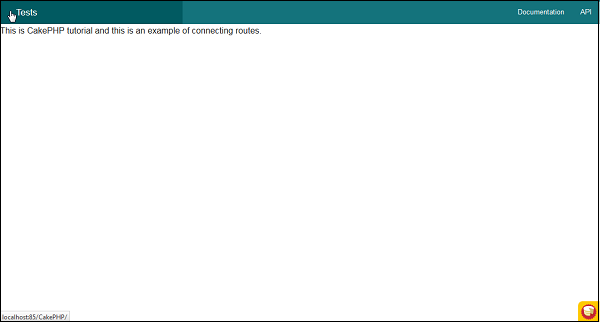
This is CakePHP tutorial and this is an example of connecting routes.
Execute the above example by visiting the following URL.
http://localhost:85/CakePHP/
The above URL will yield the following output.

Passed Arguments
Passed arguments are the arguments which are passed in the URL. These arguments can be passed to controller’s action. These passed arguments are given to your controller in three ways.
As arguments to the action method
Following example shows how we can pass arguments to the action of the controller.
Visit the following URL − http://localhost:85/CakePHP/tests/value1/value2
This will match the following route line.
$routes->connect('tests/:arg1/:arg2', ['controller' => 'Tests', 'action' =>
   'index'],['pass' => ['arg1', 'arg2']]);
Here the value1 from URL will be assigned to arg1 and value2 will be assigned to arg2.
As numerically indexed array
Once the argument is passed to the controller’s action, you can get the argument with the following statement.
$args = $this->request->params[‘pass’]
The arguments passed to controller’s action will be stored in $args variable.
Using routing array
The argument can also be passed to action by the following statement −
$routes->connect('/', ['controller' => 'Tests', 'action' => 'index',5,6]);
The above statement will pass two arguments 5, and 6 to TestController’s index() method.
Example
Make Changes in the config/routes.php file as shown in the following program.
config/routes.php
<?php
   use Cake\Core\Plugin;
   use Cake\Routing\RouteBuilder;
   use Cake\Routing\Router;

   Router::defaultRouteClass('DashedRoute');
   Router::scope('/', function (RouteBuilder $routes) {
      $routes->connect('tests/:arg1/:arg2', ['controller' => 'Tests', 'action'=>
         'index'],['pass' =>['arg1', 'arg2']]);

      $routes->connect('/pages/*', ['controller' => 'Pages', 'action' => 'display']);
      $routes->fallbacks('DashedRoute');
   });

   Plugin::routes();
Create a TestsController.php file at src/Controller/TestsController.php. Copy the following code in the controller file.
src/Controller/TestsController.php
<?php
   namespace App\Controller;
   use App\Controller\AppController;

   class TestsController extends AppController{
      public function index($arg1,$arg2){
         $this->set('argument1',$arg1);
         $this->set('argument2',$arg2);
      }
   }
?>
Create a folder Tests at src/Template and under that folder create a View file called index.ctp. Copy the following code in that file.
src/Template/Tests/index.ctp
This is CakePHP tutorial and this is an example of Passed arguments.<br />
Argument-1: <?=$argument1?><br />
Argument-2: <?=$argument2?><br />
Execute the above example by visiting the following URL.
http://localhost:85/CakePHP/tests/Virat/Kunal
Upon execution, the above URL will produce the following output.
Comments
Post a Comment